so.. it’s been already 20 months now, but i had a baby 20 montes ago..
It didn’t take me too long to decide to make him a diaper cover (of course). well i already had one successful try with baby Liat:
obviously i couldn’t make this one for my macho mano baby.
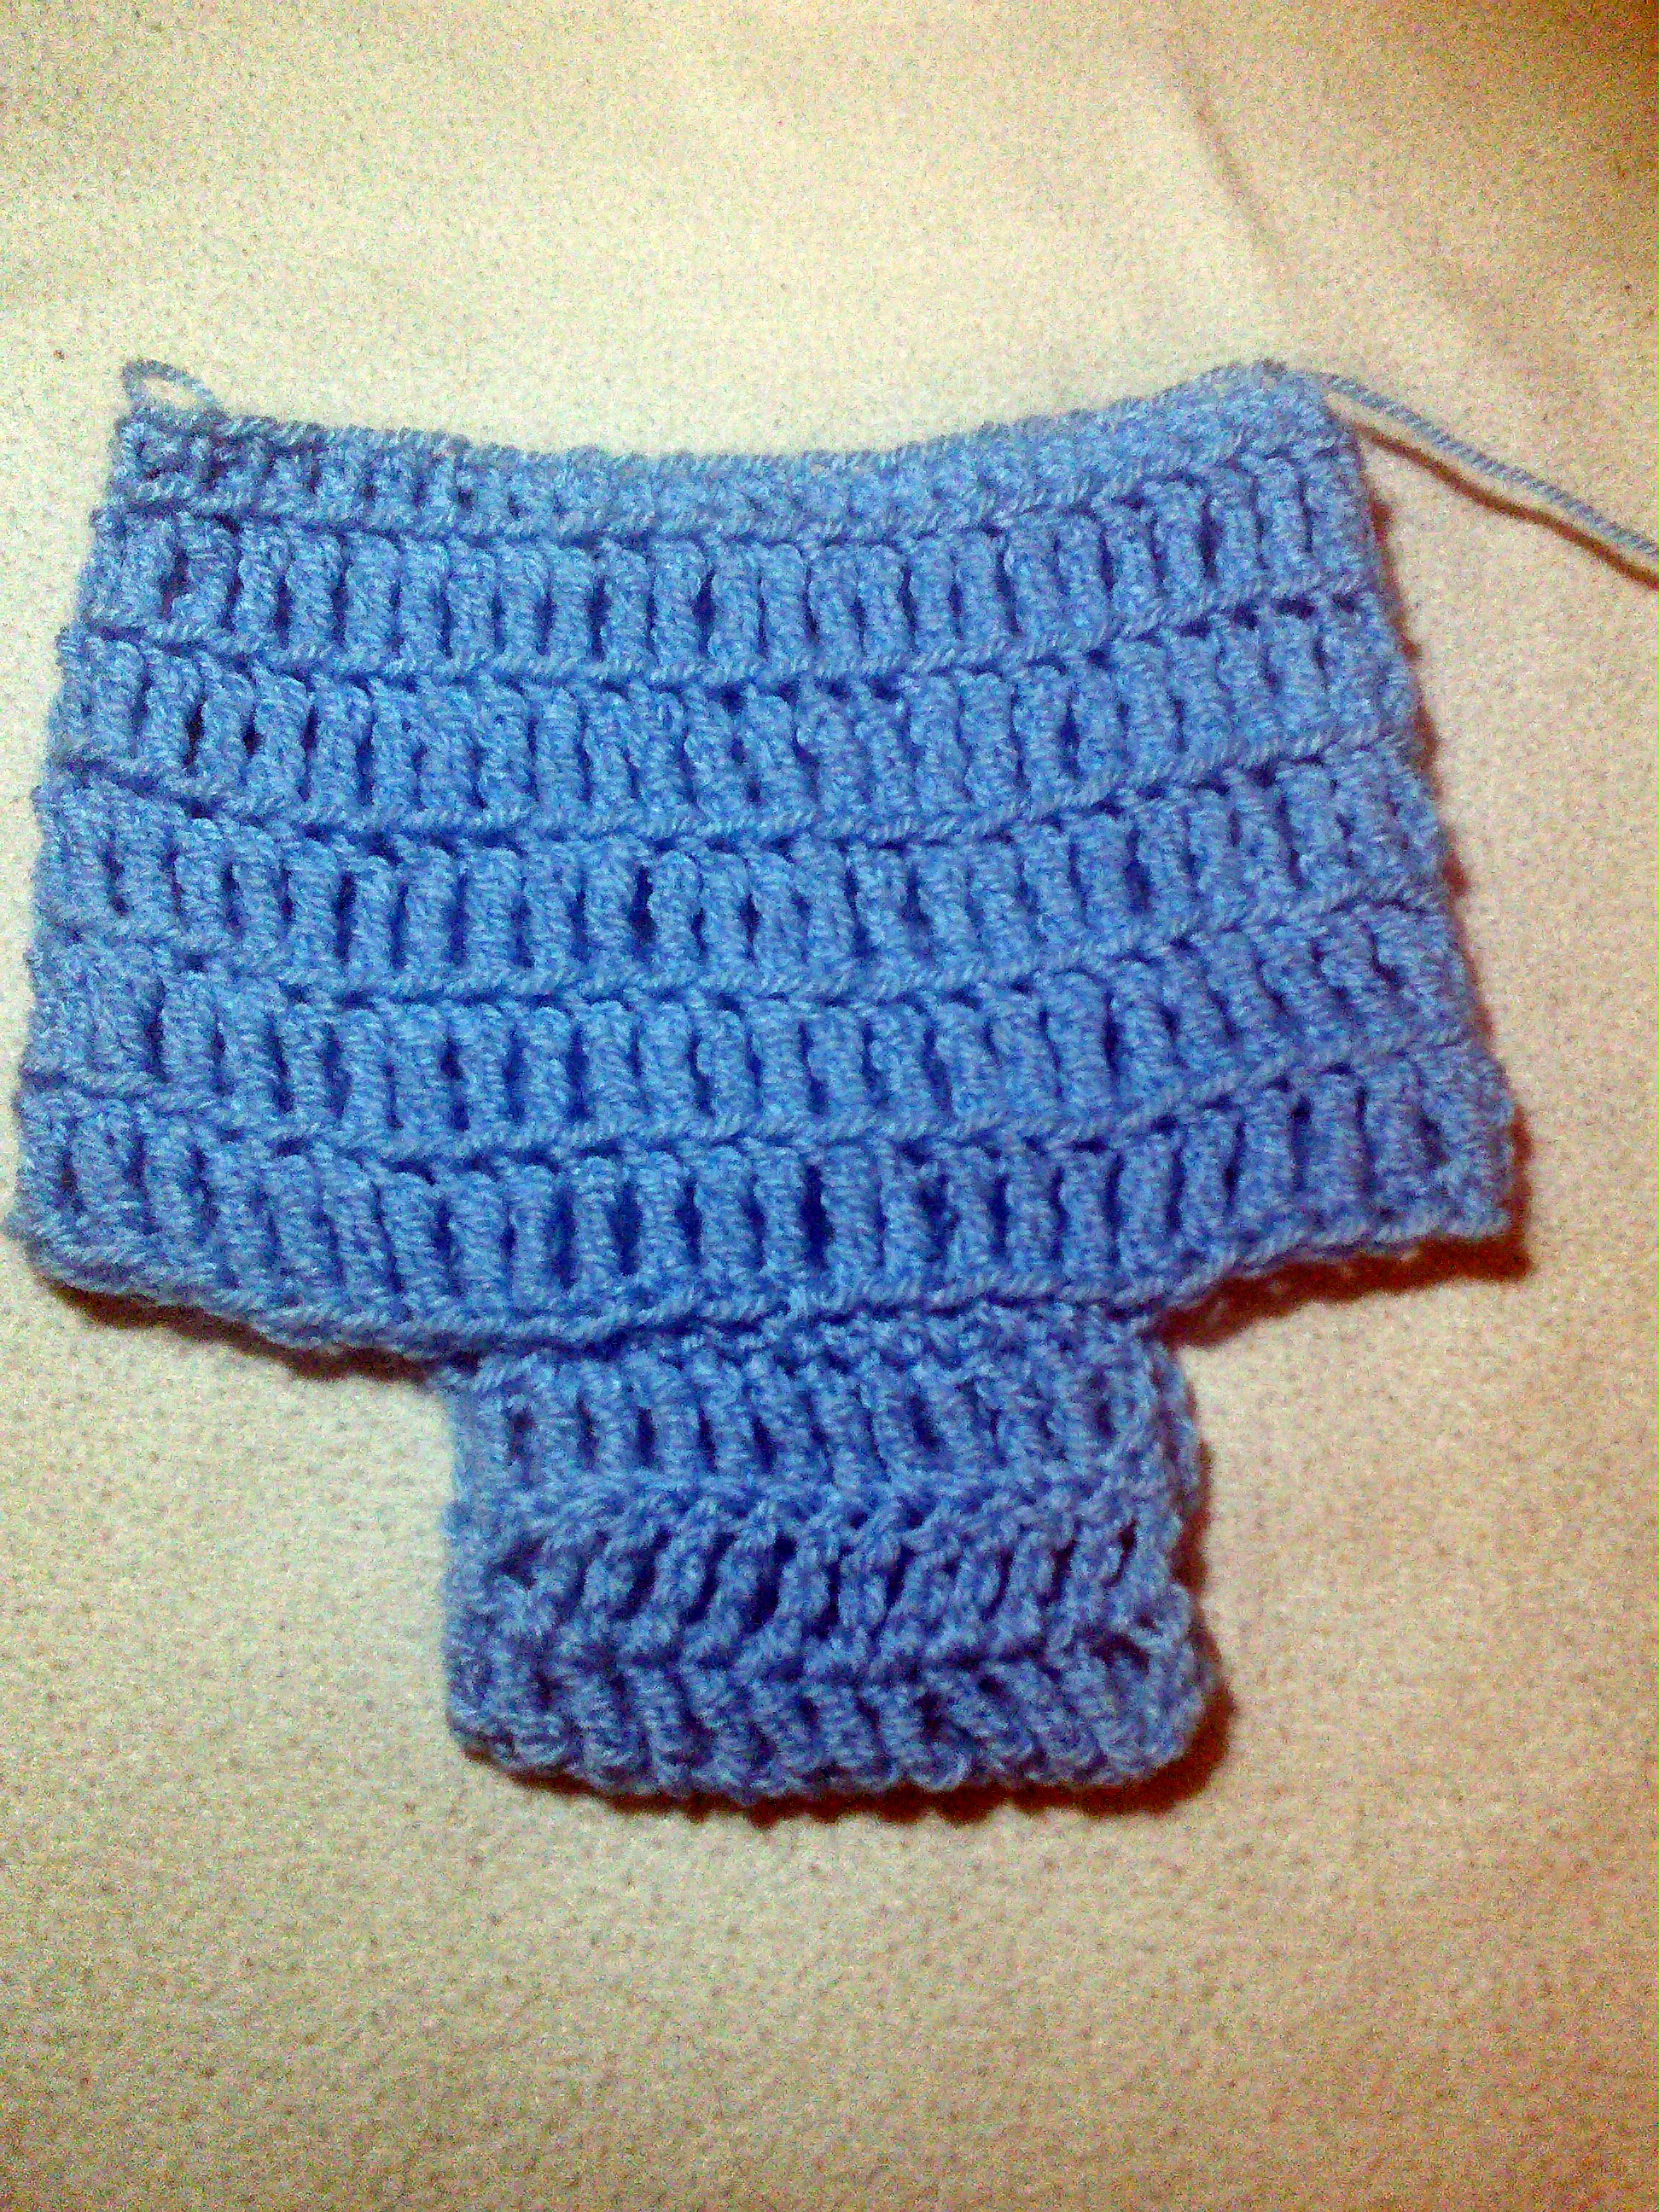
I looked up and found myself some blue yarn leftovers form my collection and started working. Then i looked in the web and found some nice ideas, but most of them were with too much sewing. After learning the pattern idea, little improvisation and this is what I came up with:
first row – make a circle in the baby’s waist size: (mine here is chain of 50 with crochet hook of 4mm)

measurement for baby waist are easily found all over but i don’t want you to leave my page while you are at it.
12″ : 0-3
14″ : 3-6
18.5″ : 6-9
19″ : 9-12
If you have a baby already near by, you could just measure his waist. very convenient, there are some ages they don’t move so much.

you can also make your circle with a foundation row. if you don’t yet know this great thing – i will be sure to add it in one of my next posts, but if you do know – isn’t that the most amazing thing you’ve learned ever??
Now after you have your circle (if you started with a foundation row can skip this line):
row 2: make double crochet row. 3 ch, (counts as first DC), 1 DC in each stitch of the first chain row, close with a slip stitch.
row 3 – 7 or until you get to 12″ all treble crochet stitches: ch 4 (counts as first TR), 1 TR in each stitch of the first chain row, close with a slip stitch
now to the tricky part:
you will have to count your stitches…
if you have 50 like me then that’s the deal:
we will need 13 stitches for the lower part, so for 2 sided we need 24.
now for the math:
50 – 26 = 24
divide 24 by 4 and you will get 6.
6 stitches which needs to be skipped in order to start working on the lower side.
so:
row 8: sl st 6 stitches (or the number you calculated..) ch 4, make 12 TR, turn
do this until you will get the same length as the body of the cover (12″)

in the last row, cut your string long enough so you can sew with it the back side of the diaper cover – count the stitches to place it in the middle and sew the edge to the body.

now if you are making a diaper cover for a girl and you want to use a sashey yarn for it you can crochet your body in back loops only and use this video to understand how to connect it to your work:
after i finished it it looked a little boring.. so i made a little Car applique. but this is not for this post..
Problem is.. my babies are growing too fast, until i finished the diaper cover, my baby was all too big for it.. 🙂 so i didn’t have the chance to take a picture of it on him.. but good news is – i can make it for your baby ! contact me for it!!
till next time! thanks for reading..


