If you are looking for a fun and easy DIY project to make with your kids, these instructions will teach you how to make a magic wallet, be careful, it’s addictive!

While I was looking for easy DIY projects to do with the kids, I have found quite a few. Most of the projects are with stuff that I already have at my house or that I can recycle. For this blog kids DIY series In addition to a helpful instructions and versatile options, I will also try to give you some good tips about how to make them as green as possible.
We did a bunch of these for a green ecology fair we held in our city . The kids were so happy to do it, they made one for each of them and then helped me with all the rest checking the quality of each wallet in the process..

Let’s start with the magic wallet, it is an easy project to start with. Moreover you probably have everything you need for it right now. Above all, your kids will love playing with them long after they finish making them.
Making sure we have all we need to make the project beforehand is always a good tip. For this project – you can use anything you have at home! For instance you can either use old shirts that can’t be worn any more, leftover fabrics from your latest sewing project – like this easy birthday flag chain, or even scrap paper, for example I like to keep the wrapping paper from birthday gifts, Therefor I can use it for craft projects, and I always have something to do with it.
Furthermore, another recycling tip for this project is for the inside of the wallet. You can use boxes of stuff you already have forit, for example: cereal box, cardboards from packages, old business cards etc. Anything you can think of that can work as inside of the wallet and outside. Keep in mind that the outside card should be more sturdy than the inside one.
What you need
- 2 pieces of soft cards like cereal box 10.5 cm () * 7 cm
- 2 pieces of harder card like package box 11 cm * 7.5 cm
- ✂️ you always need scissors
- fabric or wrapping papers
- 4pieces of elastic or ribbon at least 9 cm each
- adhesive. We used regular school white glue.
Cut the harder board to the measurement, the magic wallet should be a bit bigger than a credit card.

We did a lot 
Kids are cutting 
Finished size
Cut the softer ones as well:
Cut your fabric pieces- 2 pieces in each color total of 4.

Glue the fabric to the cardboards, make sure they turn up nice and happy for your taste!


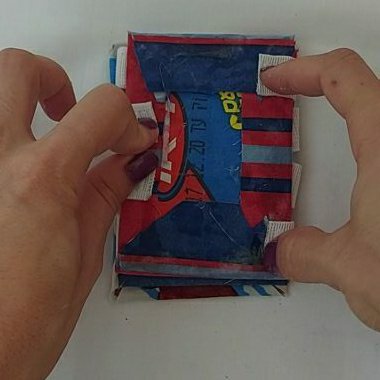
Now to the tricky part, the ribbons. we have 2 sets of ribbon, 1 set is vertical and the other is X shaped,

glue one side of the vertical one to an outer part this way and the x shape on the other side


Glue the back to secure it and then glue the other side with the opposite parts.

And there you have it. A great little project for your little ones.

kids DIY wallet 
you can also go and check out the video that i have made for this tutorial. took more time to edit than to create a blog post 🙂
You can follow me here for more fun things: